Typed List Editor, Relationships Tab
The Relationships tab, allows you to specify how the entities you have added to the typed list on the Entities tab are joined together. The relationships tab is divided in two areas: the overall overview of how the current situation is, which is the top half, and the area which shows the editors for the selected relationship or selected entity. These areas are described below.
Relationships overview area
The relationships overview area has the following look:

The Relationships tab
The relationships overview reads as a SQL join statement: each entity is
joined to the entity it is connected with using a relationship arrow.
The join statement will use the join hint specified for the relationship
(default is inner).
The screenshot above enlists four entities: Customer (aliased as C),
Order (aliased as O), OrderDetail (aliased as Od) and Employee
(aliased as E). Order is connected to Customer with an arrow pointing
from Order to Customer. This means that the relationship reads: Customer
inner join Order. When the join hint for that particular relationship is
changed to for example left, the join statement would read: Customer
left join Order. The arrow illustrates how an entity is connected to
the other entities, and it guides the user to determine join order,
which can be important in some edge case left/right join scenarios.
The other two joins in our example above are: Order inner join
OrderDetail and Order inner join Employee. The complete join list
becomes: Customer C inner join Order O inner join OrderDetail Od inner
join Employee E.
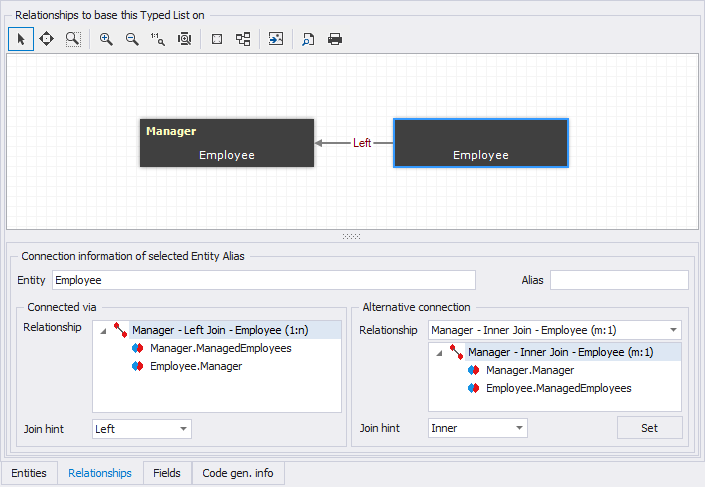
You can select an entity object and a relationship object in the relationship overview which allows you to edit the specifics of that element in the bottom area.
Selected element: Entity
When an entity is selected in the relationships overview, the following elements are available in the bottom area:
- Entity
- This is the name of the selected entity
- Alias
- This is the alias given to the selected entity. Changing it is equal to changing it on the Entities tab.
- Connected via
- This is the relationship through which the selected entity is connected to the other entities. If the entity is the 'root', like the Customer entity in the example above, Connected via is empty.
- Connected via, Join hint
- If there's a relationship specified for Connected via, you can change the join hint for that relationship using this combo box. 'None' will result in 'Inner', which is the default.
- Alternative connection
- This is the relationship through which the relationship can also be connected to the typed list. There can be more alternatives. Some alternatives can make the graph disconnected, i.e. an entity might be not connected anymore. To correct that, select the disconnected entity and select a relationship to connect it to the typed list. To set the chosen alternative as the relationship to connect the selected entity to the typed list instead of the relationship given for Connected via, click the Set button.
- Alternative connection, Join hint
- The join hint to use for the relationship selected under alternative connection. None will result in Inner which is the default.